Whether you run a business website, an online store, or a hobby blog; one thing is certain: you need to implement a regular backup schedule. Backing up your website is crucial as it gives you peace of mind and ensures you can easily restore your website should the worst happen.
A backup protects you against hackers, malware, and unintended server outages that might, otherwise, render your website unusable or cause you to rebuild your site from scratch.
Luckily, backing up your website is not hard and it can be done for free thanks to a number of WordPress backup plugins. Some of these plugins even make it easy to restore your website from a backup for free and in this article, we’ll show you how to do it.
How to Backup and Restore Your WordPress Website With Backup Guard
One of the easiest ways to backup your WordPress website is with the free Backup Guard plugin.
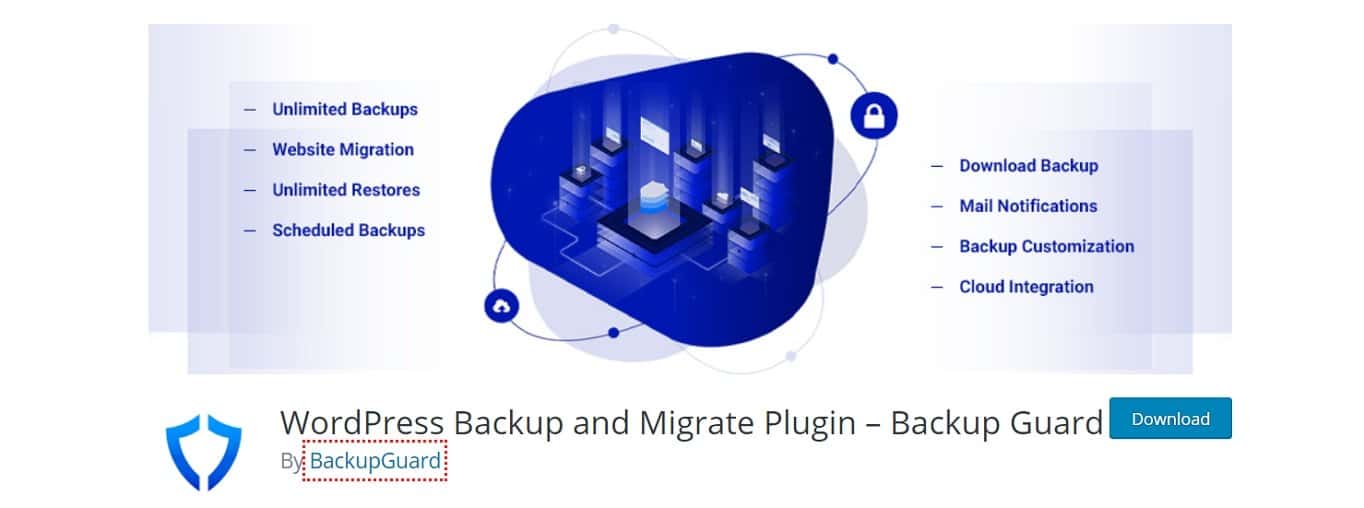
Backup Guard Plugin Overview
Backup Guard is a free plugin with more than 70,000 active installs and a 4,5-star rating. It’s one of the few rare plugins that offers both backup and restore options for free. It’s also very easy to use. Main features include:
- Manually backup your site as many times as you want
- Choose between backing up files, database or both
- Download backups to your computer or store them in your Dropbox
- Restore your site from a backup with one click
- Cancel the backup process
- Support for multisite WordPress installations
Now that you know what all is included, let’s take a look at how to use the Backup Guard plugin to backup and restore your WordPress website.
1. Installing Backup Guard
The first step is to install the Backup Guard plugin. In your WordPress dashboard, go to Plugins > Add new. Search for Backup Guard, then download and install the plugin. After it has been installed, click the Activate button. You are now ready to start backing up your WordPress website.

2. Backing Up Your WordPress Website With Backup Guard
To back up your website with Backup Guard, go to Backup Guard > Backups. All you have to do now is press the backup button. The plugin will give you the option to name your backup and select whether you want a full backup or a custom one.
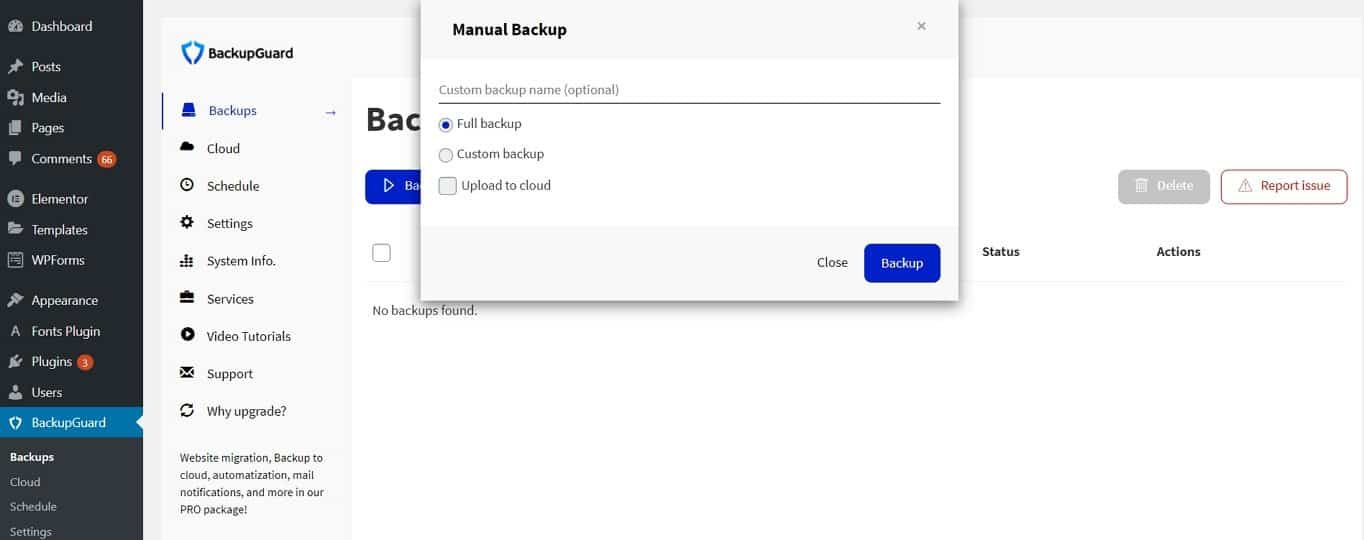
Choosing the custom option allows you to select whether you want to back up your files or your database. You can also opt to upload your backup to the cloud but you will need to connect your Dropbox account first. Head on over to Backup Guard > Cloud and toggle the switch to ON.
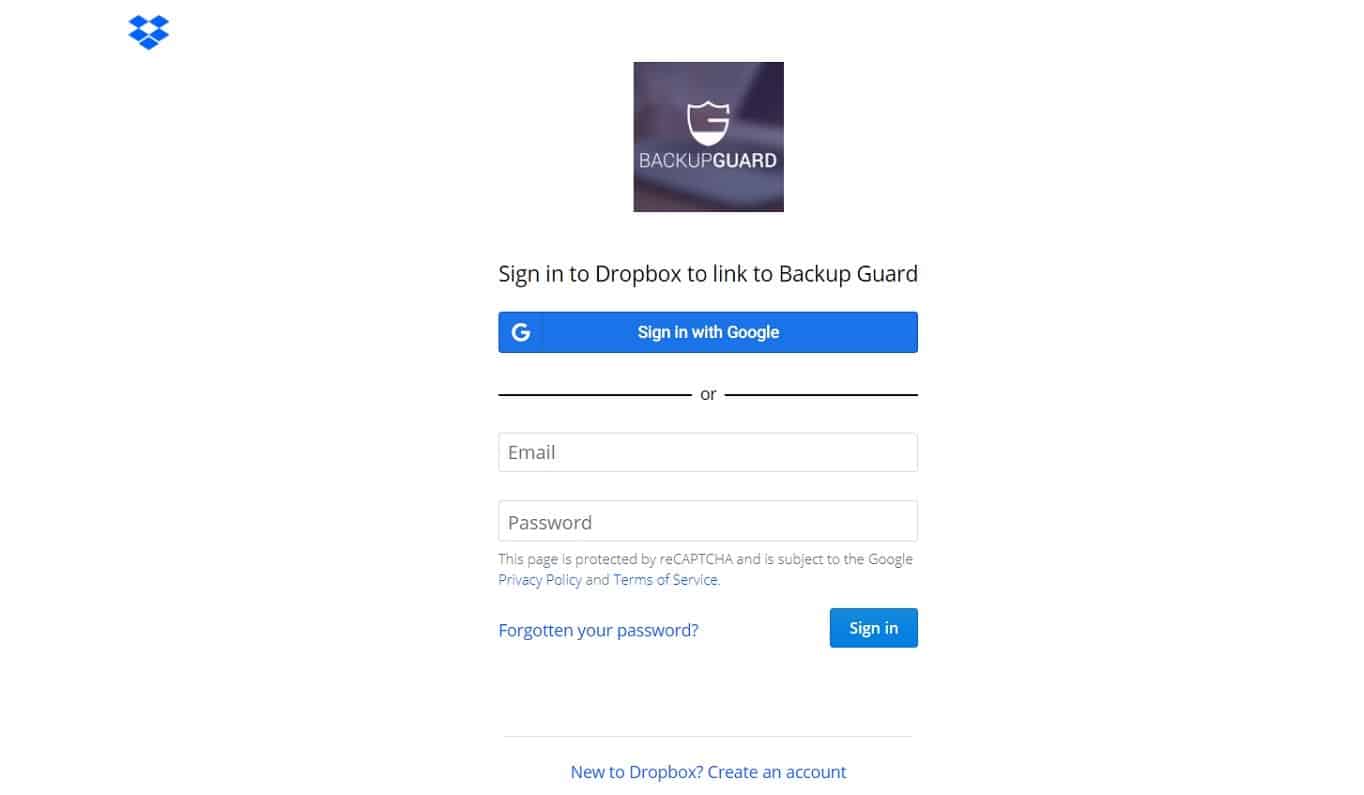
You will then be redirected to Dropbox’s website where you will need to authorize the plugin’s connection. Simply click Authorize and you will be redirected back to your WordPress dashboard where you can see that your Dropbox account has been connected.
For this tutorial, we’ve chosen the Full backup option and named my backup Test Backup. You can use the month and year naming convention so you can keep track of your backups easily.
Once you have configured your backup, simply press the Backup button and wait for the backup to finish. You can then download the backup and store it on your computer or an external hard drive.
3. Scheduling Backups
Manually backing up your website is easy but it can be tedious to keep track of the last time you backed up your website. That’s why the ability to schedule backups and have them happen regularly is a great feature.
To schedule backups with Backup Guard, go to Backup Guard > Schedule. First, toggle the switch to ON and then enter the name for your backup schedule. For this tutorial, we’ve named it Weekly Backups.
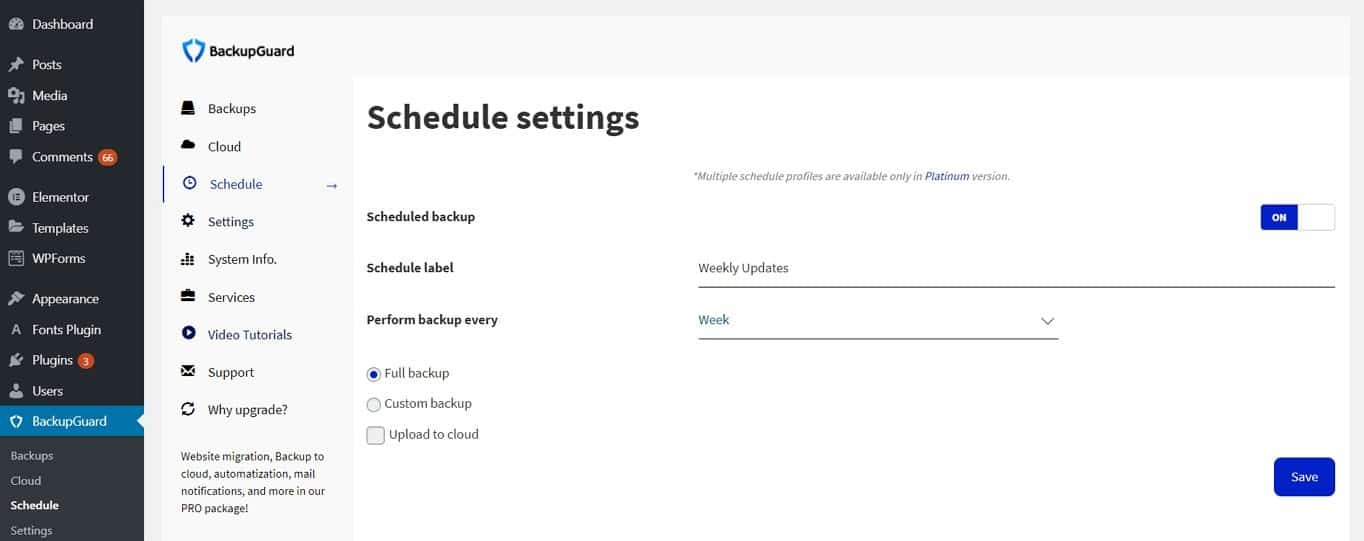
The next option is to select the backup frequency. You can choose from hourly, daily, weekly, or monthly backups. We’ve set it to weekly.
Lastly, you can set whether you want to perform the full or custom backup as you did with the manual option. We’ve selected the Full backup and all that’s left to do now is to click the Save button.
4. Restoring a Backup With Backup Guard
To restore a backup with Backup Guard, go to Backup Guard > Backups. You will see a list of all the backups performed on your site. To restore your site from any backup, click on the green restore icon and then wait for the process to finish.

Once it’s done, you can check your website and make sure everything works as it should.
Backup Guard Pro
It’s worth mentioning that Backup Guard Pro has a premium version if you need more features. The pro version includes the following:
- More control over the backup options such as the ability to include or exclude certain files and folders
- Email notifications for successful backups
- The ability to migrate your site from one domain to another
- Multiple scheduled backups
- And more
Paid plans start at $25 and include a year of support and updates.
How to Backup and Restore Your WordPress Website With UpdraftPlus
Backup Guard is a great choice to backup your site if you want a quick and simple solution. However, it is somewhat limited on a free plan, especially when it comes to backup storage options. If you’d like a more robust plugin, UpdraftPlus is another solid choice.

UpdraftPlus Plugin Overview
UpdraftPlus has over 2 million active installs and a 5-star rating. Like Backup Guard, it’s one of the few rare free backup plugins that offers both backup and restore features. The free plan offers slightly more features which include:
- Perform manual or scheduled backups
- The ability to backup files and database separately
- Store backups in Dropbox, Amazon S3, and Rackspace
- Can split your website into multiple archives
- Automatically resumes and retries failed uploads
- Easily restore your website from a backup
With that said, let’s take a look at how you can use UpdraftPlus to backup and restore your WordPress website.
1. Installing UpdraftPlus
To install UpdraftPlus, go to your site’s dashboard and click on Plugins > Add new. Search for UpdraftPlus, click Install, and then click Activate once the plugin has been installed. The plugin will then give you a brief tour of the settings and options.

2. Backing Up Your WordPress Website With UpdraftPlus
To backup your WordPress website with UpdraftPlus, go to Settings > UpdraftPlus Backups. Clicking the blue Backup button will allow you to perform your first manual backup.
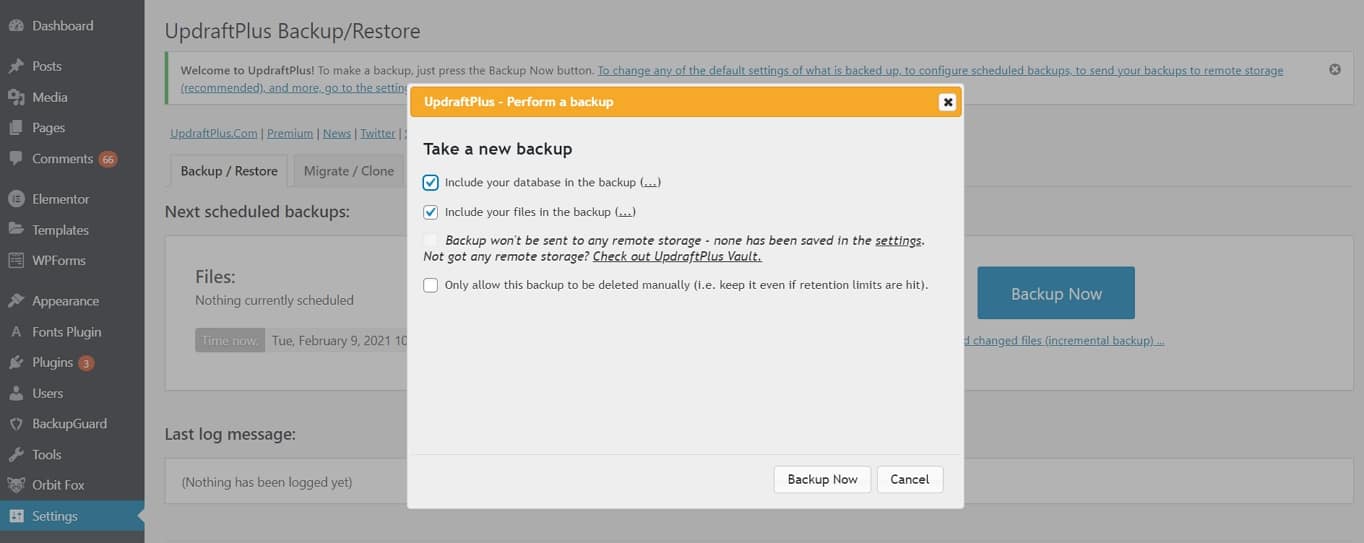
You can choose whether you want to back up your files, your database, or both, and then press the Backup now button.
3. Scheduling Backups
UpdraftPlus allows you to schedule backups. To create your backup schedule, click on the Settings tab in UpdraftPlus. There, you will be able to set up a schedule for file backup as well as for database backups.
You can set them to backup at the same time or you can set your database to be backed up daily and set your files to be backed up weekly, depending on how often you publish new posts or make other changes to your website.
Once you’ve set your schedule, you will need to connect UpdraftPlus to a storage location. Select your storage option, select which files should be included in the backup, and then save the changes. You will then need to follow the prompts that appear in popup windows to authorize the connection.
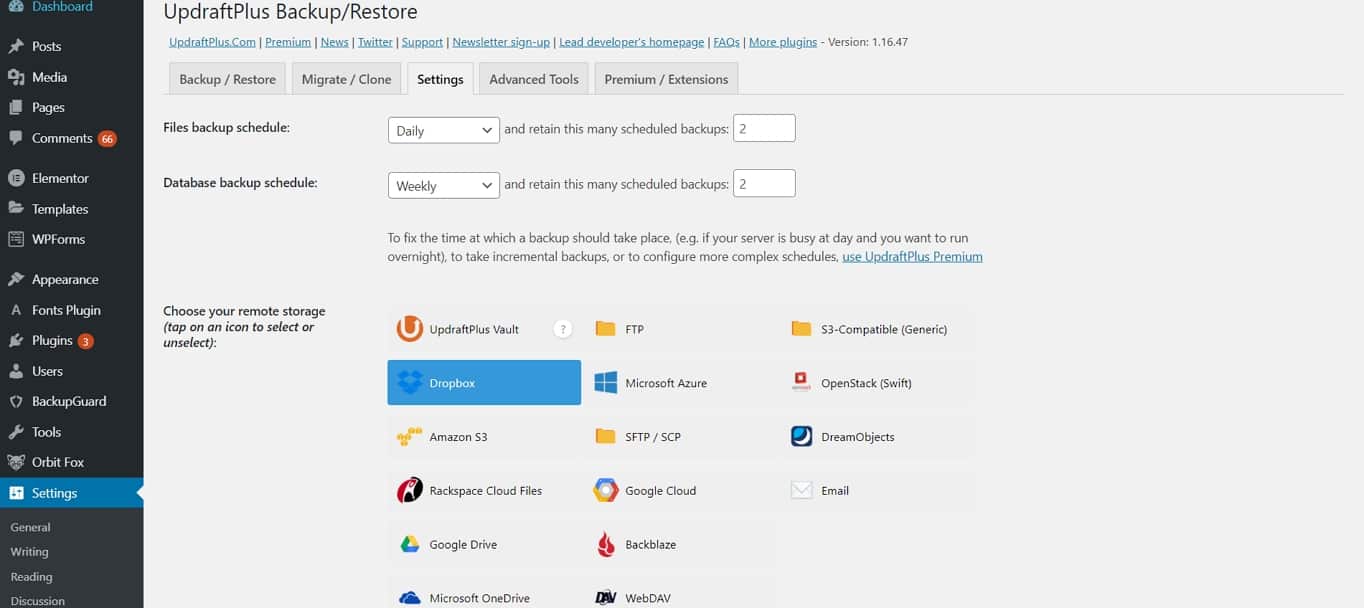
Once the authorization process is complete, your website will be backed up automatically according to your schedule.
4. Restoring a Backup With UpdraftPlus
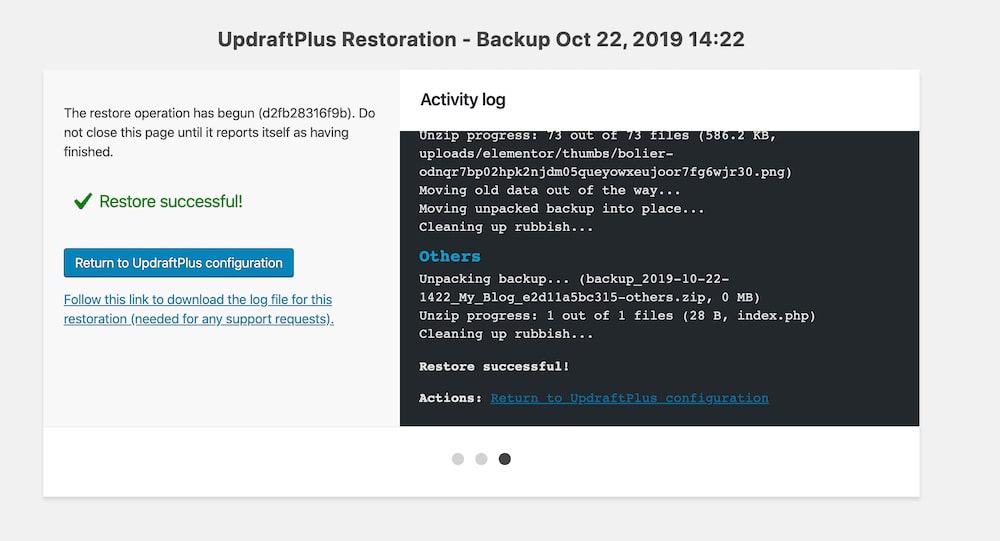
Restoring a website with UpdraftPlus is just as easy as backing it up. Head over to the Backup/Restore tab under Settings > UpdraftPlus Backups. You will see a list of all the backups that were taken from your website.
To restore your site, click the Restore button. You will then need to choose what to restore. This includes files, database, themes, plugins, and other elements of your site.
Select the desired elements and press the Restore button. The plugin will then restore operation and allow you to return to your dashboard. You can also download the log file in case you need to contact the plugin’s support team.
UpdraftPlus Premium
UpdraftPlus has a premium version, which offers even more features. These include:
- Incremental backups
- Easily duplicate or migrate websites (with Migrator)
- Multisite/multi-network compatible
- Backs up non-WP files and databases to multiple remote destinations
- Even more storage destinations include OneDrive BackBlaze, Azure, and SFTP.
- Database encryption
- Advanced reporting
- And more
Premium plans start at $70 for two sites and a year of updates and support.
UpdraftPlus or Backup Guard: Which Plugin Should You Choose?
Both plugins mentioned in this tutorial are an excellent option for backing up and restoring your WordPress site for free. If you’re wondering which option to choose, here’s what you need to know.
If you want a simple, easy, and no-frills solution, go with Backup Guard. This plugin is a great choice if you have a simple website that doesn’t publish content often.
However, if you want more storage options and the ability to schedule different backup schedules for your database and files for free go with UpdraftPlus. This plugin is a great choice if you have a website that publishes a lot of content or if you want more control over your backup options.
Final Thoughts
Backing up your WordPress website is necessary if you want to make sure your website stays safe and secure. It gives you peace of mind that you can easily restore your website and continue doing business as usual, instead of suffering downtime while you rebuild your site.
You now know how to backup and restore your WordPress website for free so there is no excuse to delay. Download either one of the plugins mentioned in this tutorial and set up your backup schedule.

MANOJ LAD
I have tried, and during setting, it gives error !o (zero), dont know why, tried with Dropbox and also with Gmail, ideally I want to take backup on my HDD.
Nick Sch"aferhoff
For specific errors, it’s always a good idea to get in touch with the maker of the plugins. As for your second issue that you would like to download your backup, this FAQ could help: https://updraftplus.com/faqs/can-make-backup-directly-pcmac/
Daniel
Hello
My name is Daniel and I need to know if either Backup Guard or Updraft allow me to backup to OneDrive?
I am new and am creating a website and learning what I can. If there is the capabilities, is there also a video on how this is done. I want to use the free version for now, but will later on upgrade to paid once I am up and running.
Thanks
Nick Sch"aferhoff
Hey Daniel, both of these plugins offer backup to OneDrive in their premium versions, not the free edition. However, with UpDraftPlus you can use Dropbox in the free version, maybe that would be an option for you.