WordPress is the most popular CMS platform in the world and for a good reason – it’s very beginner-friendly and easy to use. However, every now and then, you might stumble upon a WordPress error that might alarm you.
The good news is that whatever error you’re seeing, it’s most probably already solved by someone else and all you need to do is follow the troubleshooting guidelines.
WordPress has many support options to choose from:
- The WordPress Codex (DIY)
- The WordPress support forum (run by administrators and other users)
- Plugin and theme support (provided by the developers)
- Web hosting support (availability and type of support differs based on hosting plan)
- WordPress maintenance services ( FixRunner is our tested and recommended provider)
In this guide, we will show you 15 of the most common WordPress errors and give you several options on how to fix them.
- The white screen of death
- Internal server error
- Error establishing a database connection
- Bad gateway or gateway timeout
- Too many requests
- Connection timed out/limit exhausted
- Page not found
- Syntax error
- Unavailable for scheduled maintenance
- Auto-update failed
- Too many redirects
- Mixed content
- Failed to write to disk
- Changes not displaying
- Login failed
Ready? Let’s go.
A Guide to Troubleshooting the Most Common WordPress Errors
Even though there are a bunch of things that can go wrong in WordPress, it isn’t too difficult to narrow down the causes if you know what kind of error has occurred.
1. The White Screen of Death
The white screen of death is exactly as it sounds. You’ll attempt to access the WordPress admin or, worse, your WordPress website, and the screen will be blank.
Why does it happen?
Many things can cause the white screen of death, from conflicting plugins to exceeded memory limits (however, it’s usually a plugin or theme at fault). If there’s no error message indicating where the trouble lies, work through this troubleshooting process.
Note: Even though this is the workflow to fix the white screen of death, it’s useful for fixing other WordPress errors also. Any time we reference the “White Screen of Death fix” below, this is the process we’re referring to.
Step 1: Deactivate All Plugins
If you still have access to the WordPress admin and it’s only your site that’s down, do the following:
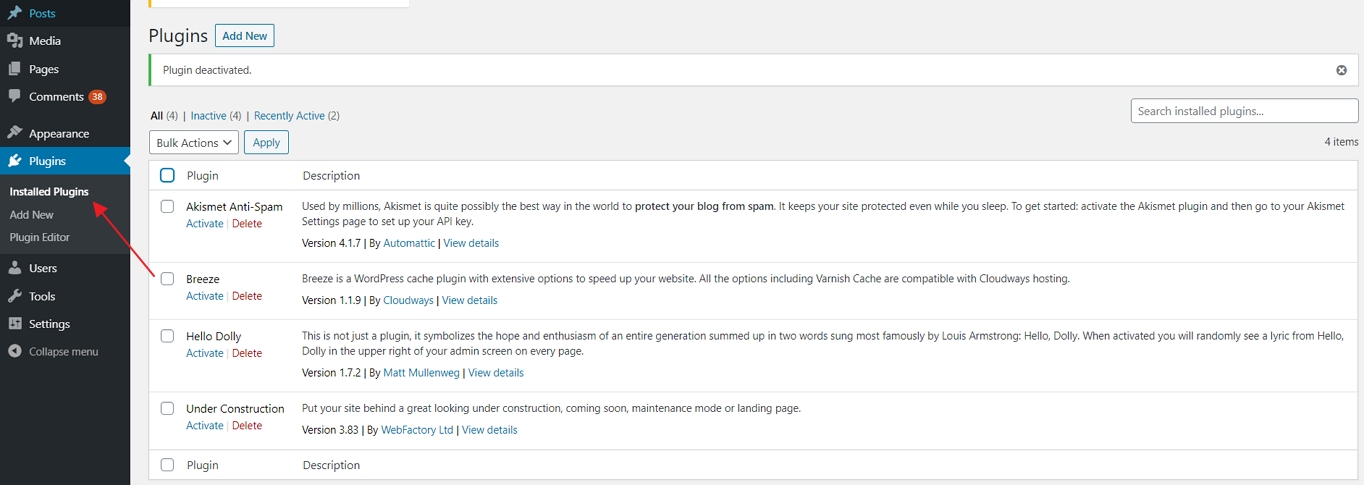
Go to Plugins > Installed Plugins:
Select all plugins:
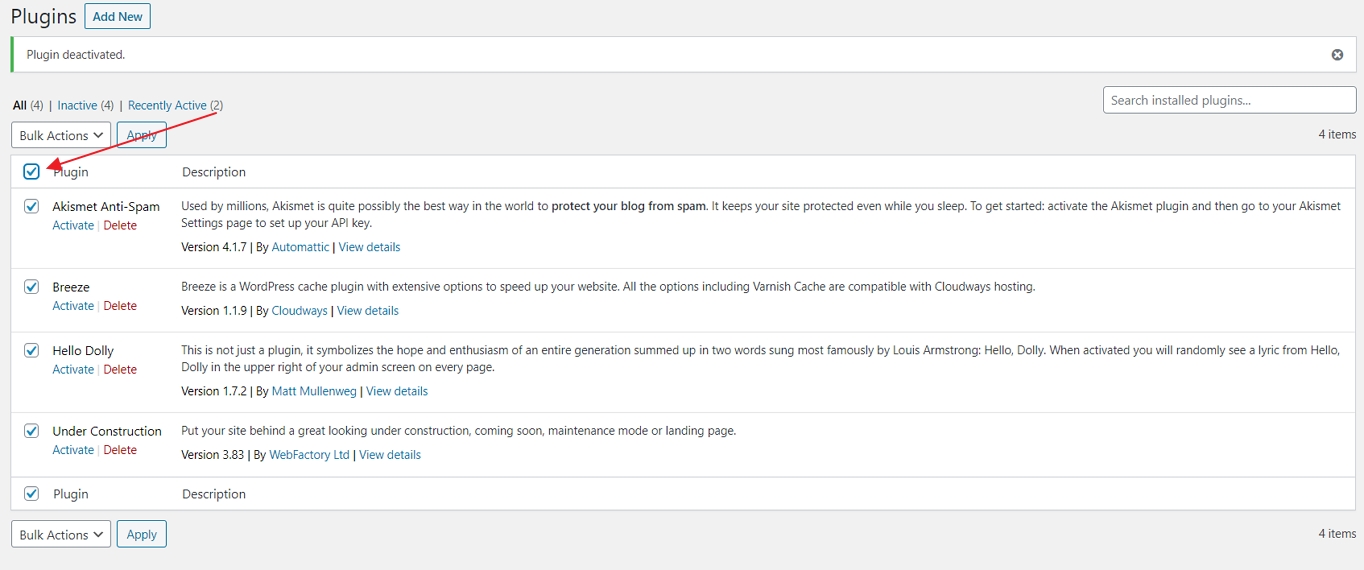
From the Bulk Actions menu, select “Deactivate”:

Your plugins should now all be deactivated.
If you don’t have access to the WordPress admin, you’ll need to do this from your control panel.
Go to your web hosting dashboard:

Locate your control panel.
What you’re looking for is either a File Manager or FTP. Both will give you access to the backend of your website.

Find the wp-content folder in your website’s root:

Open it and locate your plugins folder:

Rename the folder to anything but “plugins”. This will deactivate all plugins on your website.
Step 2: Check Your Website
With your plugins deactivated, it’s time to see if your access is restored.
If you didn’t have access to the admin before, go there now:

If it was just your website that was showing the white screen of death, hover over your website name in the top-left corner of the WordPress admin and click “Visit Site”:

Depending on what you see, you’ll have two options for the next steps:
- If you have access: Find the problematic plugin.
- If you don’t have access: Try a new theme.
We’ll walk you through those steps next.
Step 3: Find the Problematic Plugin (Option 1)
If you have access again, you know that the issue was likely a plugin. This means that one of your plugins conflicts with:
- Your theme
- Another plugin
You now need to find out which plugin is at fault. For that, you must activate your plugins one at a time.
Start with the top of your list. Activate the first plugin:

If the plugin is the cause, then you should lose access to the WordPress admin or your website again. (You can restore it once more by deactivating the plugin).
In case you don’t see the white screen of death, deactivate this plugin and try the next one. You’ll have to repeat these steps until you locate the problematic plugin.
This, of course, assumes that the plugin conflicts with your theme. If you don’t see the error screen again after deactivating each plugin one by one, then the issue may be between two plugins. You’ll need to reactivate two at a time to locate them.
That said, this isn’t common. In most cases, it’s a conflicting script in a plugin and theme that throws the error.
Once you’ve identified the problem, go ahead and reactivate all of the other plugins on your website.
It’s a good idea to reach out to the plugin developer to report the issue. Make sure you have screenshots of the error and describe in detail why it happened and how you were able to confirm it.
Step 3: Try a New Theme (Option 2)
What if you’re still seeing the white screen of death even after deactivating all of your plugins?
Then your theme may be to blame. To confirm this, you need to deactivate your theme.
If you have access to the WordPress admin and it’s only your site that’s down, do the following:
Go to Appearance > Themes.
In order to deactivate your theme, you have to activate a different one.
Whether it’s already installed or not, activate the latest WordPress default theme:

If you don’t have access to the WordPress admin, do the same thing you did with your plugins from the control panel.
Once more, find the wp-content folder in your website’s root and look for the “themes” folder.

Rename the folder to anything but “themes”. This will deactivate your theme and automatically activate the default WordPress theme.
You can now check your website to see if the white screen of death is gone. If it is, then you know that the issue is a conflict between your theme and the core.
Contact the theme developer with screenshots of the error and a description of the steps you took to confirm the issue.
Step 4: Run the Debug
In most cases, the steps above will help you locate the issue with your website. However, if you’ve reached this point and still see the white screen of death, there’s one last thing to try.
Return to your file manager or FTP. Go to the root directory and search for the wp-config.php file:
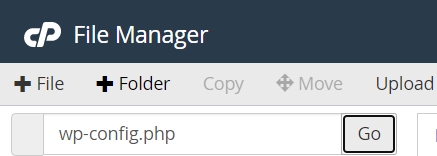
Open the file for editing.
Towards the bottom, you’ll see the following string:
define( 'WP_DEBUG', false );
 define( 'WP_DEBUG_LOG', false );
 define( 'WP_DEBUG_DISPLAY', false );
In other words:
- The debug feature is turned off.
- If an error occurs, no log will be generated from it on the backend.
- If an error occurs, no error code will display on the front end.
However, if you’re stuck, then it’s useful to turn this feature on so you can get more details about the error. To do this, change the top two values to true:
define( 'WP_DEBUG', true );
 define( 'WP_DEBUG_LOG', true );
 define( 'WP_DEBUG_DISPLAY', false );
Keep display set as false as don’t want hackers to have any insight into what’s happening on the backend of your live site. So always keep those codes hidden from them.
Save your file once you’re done enabling debug (but leave the control panel open). Then, return to your website.
In case you see the white screen of death again, go back to your control panel and look for the wp-content folder (the same one where your theme and plugins are). There will now be a text file called debug_log.
Open it and review the error message. Look for today’s date and time. There should be a line that indicates which file in your directory and which line in that file contains the error.
If the error is inside one of your theme or plugin files, take a screenshot of it and send it to the developer so they can patch the issue (as it was likely introduced in a recent update).
If there’s a problem with another file, it’s up to you to repair it. In case you’re not comfortable doing so, contact a developer who can help.
Once the issue is repaired and the white screen of death is gone, go back to wp-config.php and disable the debug.
2. Internal Server Error (Error Code 500)
It’s never 100% clear what exactly caused the 500 internal server error. However, like the white screen of death, there’s probably something wrong with your code.
Let’s now check how to fix this.
Step 1: Replace .htaccess File
The first thing to test is the .htaccess file. Sometimes it becomes infected and causes your website to be replaced by an “Internal Server Error” page.
Regardless of whether the file’s been corrupted, you should still do this step. No harm will come to your website if you replace the existing .htaccess file.
Log into your control panel and open your file manager or FTP manager. Before you enter the root directory of your website, select the option to “Show hidden files” (if you have it):
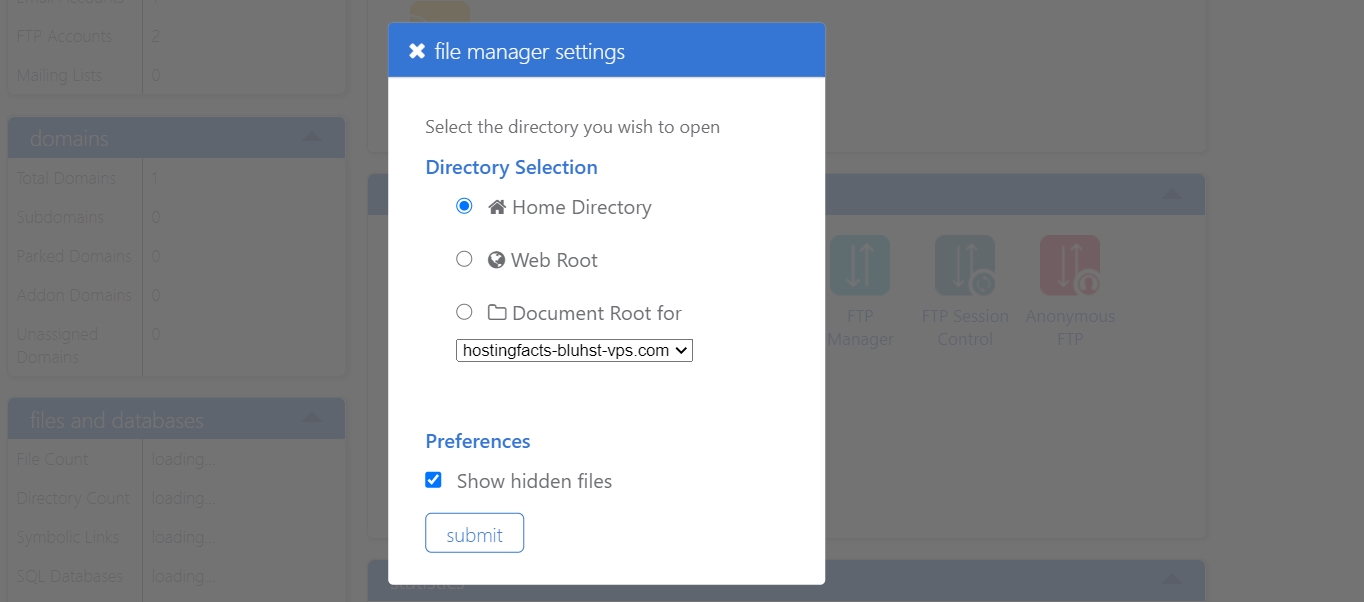
If your website is on shared hosting, the file might still be hidden. If that’s the case, add the following to the end of the file manager’s URL: “&showhidden=1”.

Rename the .htaccess file to deactivate it.
Go to your website and see if that removed the internal server error. If it did, then all you need to do is create a brand new file.
Go to the Settings > Permalinks:

Click “Save Changes” at the bottom of the page as this will create a new file.
If the error did not go away, try this next workaround.
Open your new .htaccess file and add the following:
# BEGIN WordPress
 RewriteEngine On
 RewriteBase /
 RewriteRule ^index\.php$ - [L]
 RewriteCond %{REQUEST_FILENAME} !-f
 RewriteCond %{REQUEST_FILENAME} !-d
 RewriteRule . /index.php [L]
 # END WordPress
If this doesn’t remove the corruption, move on to the next step.
Step 2: The White Screen of Death Fix
Run through the white screen of death troubleshooting steps.
If the error still exists, try step 3.
Step 3: Increase the Memory Limit
This isn’t a likely cause. Because you’ll usually see a memory exhausted-related message if the limit is full. However, since it’s a quick fix, it doesn’t hurt to give this a try.
Run through the increased memory limit troubleshooting steps.
If you’re still stuck, the following step should do the trick:
Step 4: Replace the Wp-Admin and Wp-Includes Folders
An update may have unintentionally damaged the code in your wp-admin or wp-includes folders.
To replace these, you’ll need to retrieve a fresh copy of WordPress.
Go to WordPress.org, click the “Get WordPress” button, and download the files to your desktop.
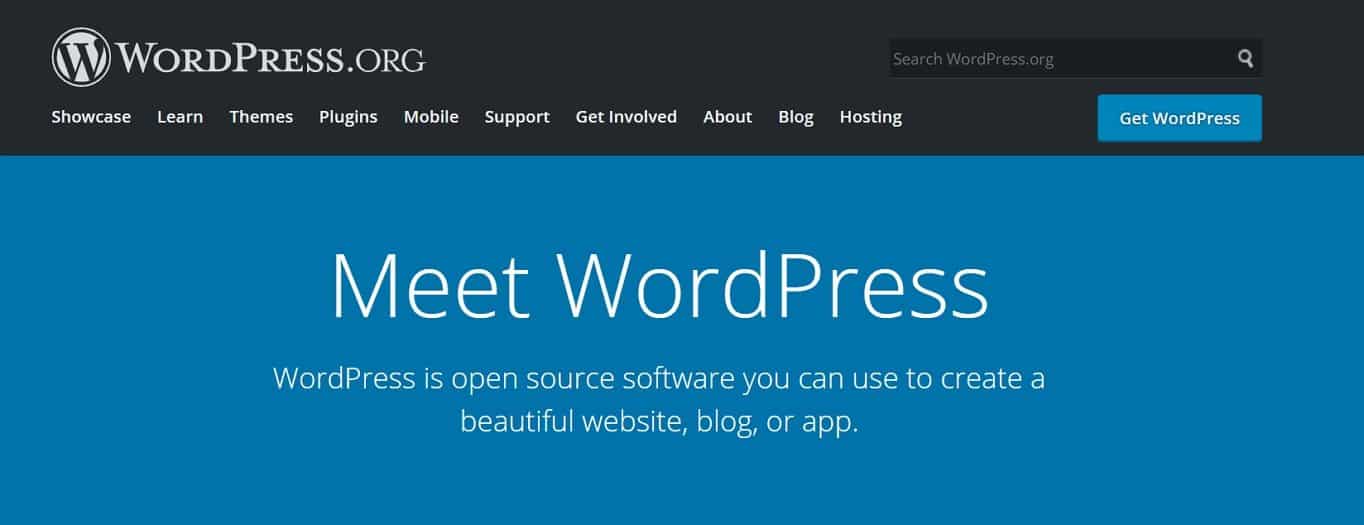
Unzip the folder and locate the wp-admin and wp-includes folders.
Return to your file manager. Download a copy of the wp-admin and wp-includes folders that already exist (it’s always a good idea to have a copy just in case).

Click “Upload”. Then, re-upload each folder one at a time. You only need to do this for wp-admin and wp-includes.

You can now return to your website. The error should be gone. If not, it’s time to reach out to your web hosting company for assistance.
3. Error Establishing Database Connection
When you see this error message, it means that something is keeping your WordPress site from connecting to its MySQL or MariaDB database.
Step 1: Check the wp-config.php File
The wp-config.php file contains the most relevant details about how your website is configured —it includes your database information. Check this first before trying any other fixes.
Go to your file manager or FTP and make your way to the wp-config.php file. Open it for editing.
You should find a section dedicated to your database settings:
/** Name of the database for WordPress */
 define( 'DB_NAME', 'database_name' );
/** Database username */
 define( 'DB_USER', 'database_username' );
/** Database password */
 define( 'DB_PASSWORD', 'databasepw' );
/** Hostname */
 define( 'DB_HOST', 'database_hostname' );
/** Database Charset */
 define( 'DB_CHARSET', 'utf8' );
/** Database Collate type */
 define( 'DB_COLLATE', '' );
If any of this data is missing or looks incorrect, make your edits (after saving a copy of the wp-config.php to your desktop).
Save your changes and return to the website and check if it’s still unable to connect to the database.
Step 2: Contact your web host support
If there’s no clear disruption to the WordPress database connection on your end, then it’s time to talk to your web host.
There are several reasons why the database connection might be compromised:
- Server downtime
- Plan limits are exceeded (though you should have been informed about it if that’s the case)
- Security breach
Once you know the root cause, work quickly to repair it. Even if it just means getting an ETA on when the servers will be back online. You can’t afford to let your site stay down for too long.
Error #4: Bad Gateway (Error Code 502) or Gateway Timeout (Error Code 504)
These error codes mean that there’s something wrong at the server level. While you might not have direct control of the server, these faults can sometimes be temporary so it’s a good idea to work through the troubleshooting steps before contacting your host.
Step 1: Refresh the Site
Click the “Refresh” button in your browser bar:
![]()
You might have tried to load your website when the server was temporarily down or glitching.
Step 2: Clear the Browser Cache
If refreshing doesn’t work, the issue could be caching-related. To get your website “unstuck”, go to your browser settings.
Look for an option to clear your browsing data. In Chrome, the settings look like this:

Check the setting for cached images and files:
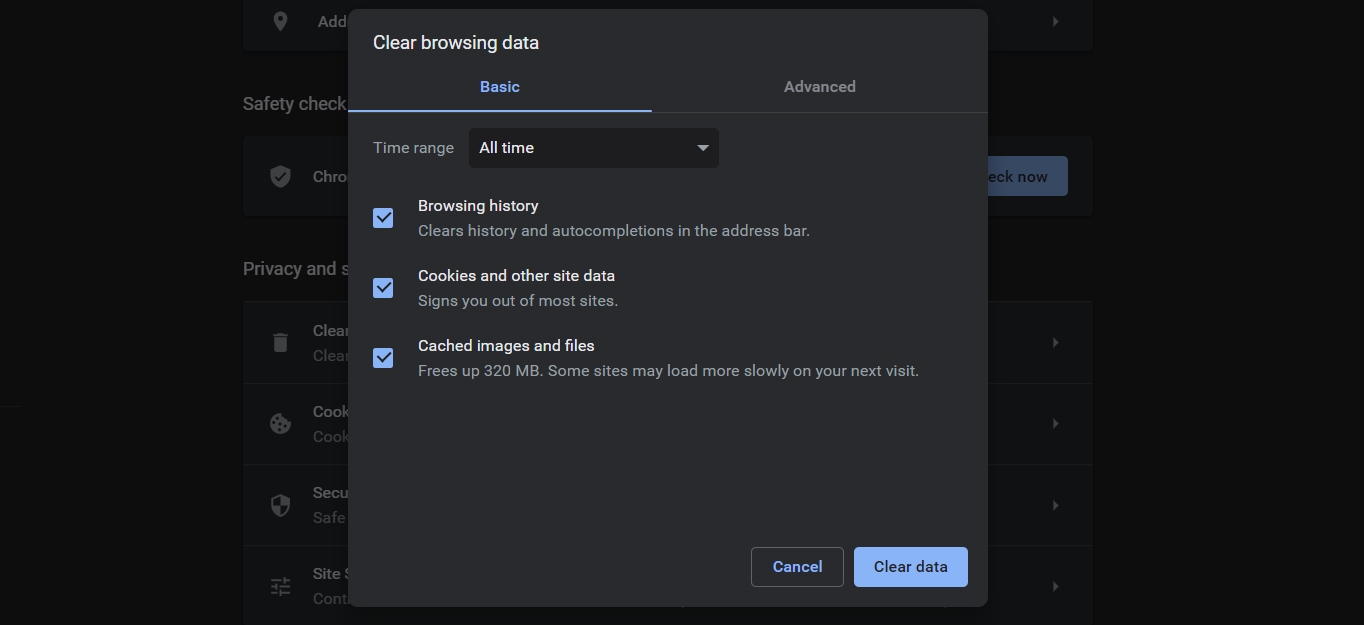
Then, click “Clear data”. Once it’s done, reload your website and see if that removed the error code.
Step 3: The White Screen of Death fix
A recent plugin or theme update may be to blame if the above two fixes don’t work.
Run through the white screen of death troubleshooting steps.
Step 4: Check with Your Host or CDN Provider
If none of the options above have worked, you’ll want to reach out to your host or CDN provider.
When you get in touch, make sure to have a screenshot of the error and details about the troubleshooting steps you’ve taken thus far. The support might need to disable your DNS, CDN, or firewall to get rid of the fault.
5. Too Many Requests (Error Code 429)
This error usually means that there’s a plugin or theme script that’s sending too many requests to your server.
Step 1: The White Screen of Death fix
Run through the white screen of death troubleshooting steps.
If you can’t remove the error with this process, get in touch with your hosting company. They should be able to tell you which third-party integration is working in overdrive.
In case there’s a way to reconfigure the settings to fix the problem, do so. Otherwise, you’ll need to find a replacement tool.
6. Connection Timed Out/Limit Exhausted
With this error, you’re not going to lose access to your website or the admin area. Instead, it means that the action you’re trying to take in WordPress, for example, installing a new theme, is exhausting the limits of your server.
Step 1: Increase Memory Limit
Go to your file manager and open the wp-config.php file.
At the bottom of the file, look for a string that looks like this:
define( 'WP_MEMORY_LIMIT', '64M' );
It’s the “64M” bit that needs to be updated. To give your server more memory to process your request, increase the limit to 256M:
define( 'WP_MEMORY_LIMIT', '256M' );
Try to run your request through WordPress again. If it doesn’t work, try this:
Step 2: Increase Maximum Execution Time
It might just mean that the amount of time to process a request has exceeded the default maximum execution time.
There’s a good reason for this limit. For example, to stop hackers from bombarding your server with the same requests. However, you can temporarily adjust it to allow your request to go through.
From your file manager or FTP, locate the .htaccess file. If you’re having a hard time finding the .htaccess file, review the steps from the internal server error fix.
Inside the file, scroll to the very bottom. You’ll see a line that looks like this:
# END WORDPRESS
Just above it, place the following:
php_value max_execution_time 300
By default, the maximum execution time is usually 30 to 60 seconds. This will raise it up to 300 seconds.
Give your request another try. If it works, remember to go back to your .htaccess file and either remove the line altogether or rewrite it so it says:
php_value max_execution_time 60
If this didn’t work, update 300 to 600 and repeat. In case still not fixed, then there might be something wrong with a recently updated plugin or theme.
Step 3: The White Screen of Death fix
Run through the white screen of death troubleshooting steps.
If you’re still stuck, reach out to your hosting provider.
7. Page Not Found (Error Code 404)
It’s not unusual to run into a ” 4040 page not found” error around the web if a page no longer exists at its original URL and a redirect isn’t set up. However, there are times when you might see this error even when a page exists at the address typed in.
Step 1: Verify the Spelling of the URL
Just to be on the safe side, double-check the spelling of the URL you entered into the address bar. Make sure there are no errors.
Step 2: Fix Permalinks
If at any time you switched your permalink structure, a previous setting may have gotten stuck in the backend. To dislodge it, go to Settings > Permalinks.

Switch your permalinks structure back to the default setting “Plain”:

Save your changes.
Revert to the permalinks structure you wanted to use. Save once more.
Check the page to see if the 404 error is still there. If it is, then go to the next step.
Step 3: Replace .htaccess file
Run through the corrupted .htaccess file fix.
That should get rid of the fault.
8. Syntax Error
You’re going to see this error after editing a file on the backend of your website.
When you see “syntax error”, it means there’s a violation of proper coding practices.
For example, it’s a syntactical fault when the final semicolon (;) is missing:
define( 'WP_MEMORY_LIMIT', '64M' )
This is also a syntactical error because the straight quotes are written as curly quotes:
define( ‘WP_MEMORY_LIMIT’, ‘64M’ );
You may also encounter an “unexpected error”. This means that something is misspelled or incorrectly formatted.
Step 1: Fix the Code
These types of errors are more explicit than most others on this list. When you see one, it should tell you not only which file contains the error, but also which line the error occurred on. This makes inspecting the code for missing or inaccurate characters much easier.
Once you find the issue, repair it, and save your changes. Revisit your site to confirm that the error is gone.
9. Unavailable for Scheduled Maintenance
The main reason for this error is that WordPress put your website into maintenance mode while an update was being made.
It could be:
- An update you just pushed through.
- An auto-update done by WordPress.
- An earlier update got your website stuck in maintenance mode.
Step 1: Give It a Minute
Before you do anything, just give it some time. Even if you didn’t manually push an update, WordPress might be working on one in the background.
If the scheduled maintenance message is still there, move on to the next step.
Step 2: Disable Maintenance Mode
Log into your control panel and file manager. Go to the root of your website and look for a file called .maintenance.
To disable maintenance mode, simply click on the file and delete it. This will bring your website back.
10. Auto-Update Failed
By default, WordPress has configured minor updates that run automatically (mainly those responsible for general maintenance and security). You may also have your own automated updates scheduled.
Regardless of where they originated, there might be times when the update fails to go through. It could just be bad timing (like if the server was down at that exact moment) or a glitch in the system.
Step 1: Manually Update
The fix for this one is simple.
You’ll see several indicators in WordPress that let you know which updates need to be done:

Follow them and issue the update manually.
11. Too Many Redirects
Usually, a redirect is intentional. You update your domain name or move your website from HTTP to HTTPS. In those cases, you use a 301 redirect to ensure traffic gets to the correct destination even though your visitors type in the old URL.
However, if you’re seeing an error that says there are too many redirects, it usually means your visitors are stuck in a redirect loop with nowhere to land.
This happens when your site’s and WordPress addresses are different.
Step 1: Update WordPress Settings
The first place to check for this discrepancy is your WordPress settings. Go to Settings > General.
The addresses for WordPress and the site should match:

If they don’t, fix the incorrectly formatted URL and save your changes.
If that doesn’t troubleshoot the error, check your site data at the server level.
Step 2: Update the wp-config.php File
The wp-config.php file contains a lot of data about how your website is configured, including its domain name.
Log into your file manager or FTP and open your wp-config.php file. Look for a string of code that looks like this:
define( 'WP_HOME', 'https://faux-agency.local' );
define( 'WP_SITEURL', 'https://faux-agency.local' );
Replace the test site URL above with your own WordPress and site addresses. Again, these two values should be identical.
They should also match how they’re configured at the server level. So, if the domain is registered as https://www.faux-agency.local, then the HTTPS and WWW values need to be present here.
Save your changes and return to your website. The error should be gone.
12. Mixed Content
Another error that stems from the formatting of your web address is the mixed content error.
This means that:
- Your website has an SSL certificate installed and it now runs through HTTPS.
- There are some elements like image files, pages, or links on your site that continue to use HTTP.
Websites must be all HTTPS or all HTTP. To remove this error, you must move your unsecured content to the secured web address.
Rather than take steps to repair this one, choose the option that best suits you:
Option 1: Use the Inspect Tool
Open your website and right-click anywhere on the screen. Select “Inspect” from the options:

Look for the Console panel. If any mixed content error exists on this page, you’ll find it here:

It will tell you exactly which part of the page contains the HTTP content. You can then fix it by repairing the incorrect link or re-uploading the file.
Option 2: Use the SSL Insecure Content Fixer Plugin
Install the SSL Insecure Content Fixer plugin to help you out.

Start with the “Simple” setting and see if that repairs the issue. If it doesn’t, make your way through the subsequent settings until you find one that fixes the mixed content issue.
Option 3: Contact You Hosting Support for Help
Contact your web hosting company if you are at a loss for where the mixed content error lives.
13. Failed to Write to Disk
This glitch occurs mostly when you’re having problems with the images on your site.
It will appear when a file fails to upload and when your media files look as though they’ve disappeared from your Media folder as well as on your website. There will be blank placeholders for them, but the content won’t show.
This has nothing to do with trying to upload unacceptable file types. It means that file permissions are not being correctly configured on the backend. An update from your web host or a plugin could have messed them up.
Step 1: Update Permissions in wp-content Folder
Go to your FTP and locate the wp-content folder. Open it and look for the uploads folder. Right-click on it. Select “Change Permissions” (it might also be called “File Permissions” or just “Permissions”).

If the screen doesn’t look like this, you’ll have to ask your web host to either update your file permissions access or for support.
If you do see a screen like this, update the “Permissions Value” to 744. Check the “Recursive” box below and apply it to directories only. Save your changes.
Right-click on the uploads folder once more. This time, set the “Permissions Value” to 644. Check “Recursive”, yet apply it to files only. Save your changes.
Return to your website and you should see that your media files are intact (or that you’re able to upload media files without fail).
14. Changes are Not Displaying
This isn’t an error that will come with a message or a white screen. More likely you will see it yourself after making an update, only to realize it’s not appearing on the live site.
This happens due to a caching issue.
Step 1: Clean the Page Cache
If you’re using a WordPress caching plugin, the first thing to do is clear the cache.
Most WordPress plugins will place a “Purge Cache” or “Clear Cache” button in the admin menu bar at the top of WordPress like this:

This will clear the page cache for all users and visitors. Return to your website and see if that helped. If not move on to the next step:
Step 2: Clear the Browser Cache
In some cases, it’s your web browser that’s the issue. To clear the browser cache, locate your browser’s Settings:

From there, locate the setting that allows you to clear your browsing data or cache:

Now, clear your browser cache:

Once done, you’ll be returned to the Settings page. You can now visit your website to confirm the issue is fixed.
15. Login Failed
There are two reasons why you’re unable to log into the WordPress admin. Each has a separate fix.
Option 1: Restore Password
If the issue is that you’ve forgotten your password, click the “Lost your password?” link below the login form:

Enter your email address or username in the recovery form:

You’ll receive an email to create a new password and recover access to your account.
Option 2: Update Login Credentials in phpMyAdmin
In case you haven’t lost or forgotten your login credentials, but you still can’t log in, you’ll need to use phpMyAdmin to manually reset them.
Go to your control panel and look for phpMyAdmin.

This is your phpMyAdmin console:
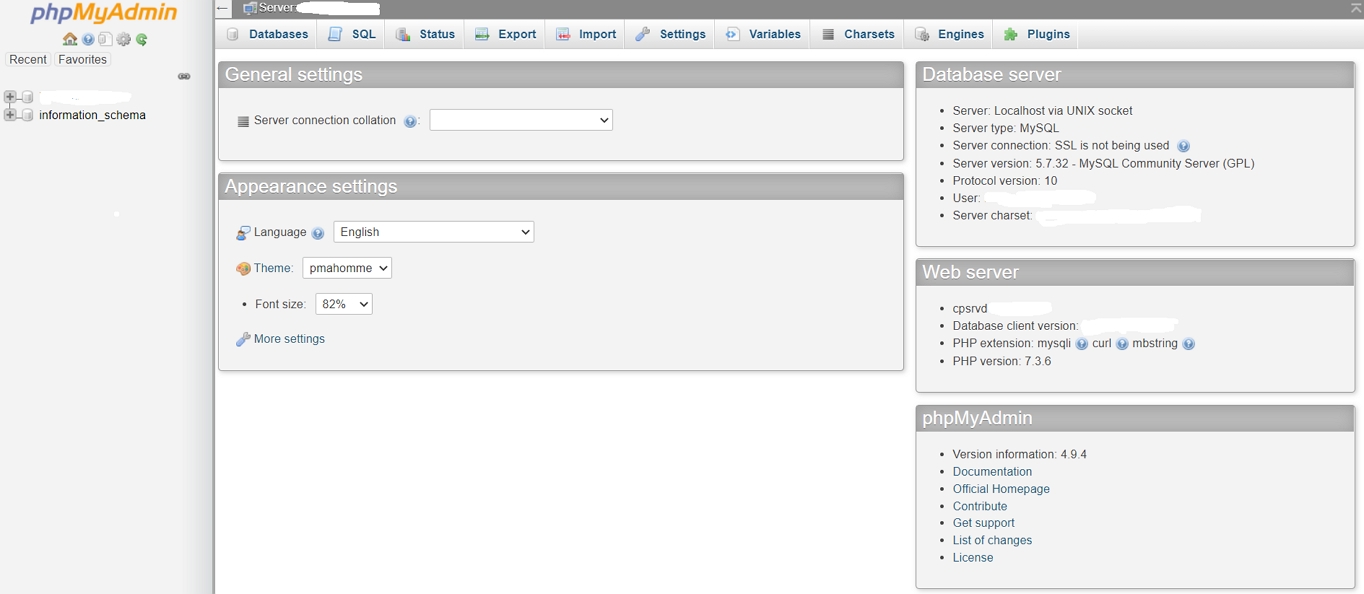
Expand your database on the left panel. Look for the wp_users table. Click on it or choose the “Browse” option to open your list of WordPress users.

To edit the login credentials, click the “Edit” button to the left of their login details.

Edit the password and make sure it’s a strong mix of uppercase letters, lowercase letters, numbers, and symbols. Next, save your changes.
You can return to the WordPress login screen and try again. If the issue persists, reach out to your web hosting company for assistance.
Wrap-Up
Most of us hope that we’ll never encounter any of these errors when working with WordPress. However, glitches and errors can come from a variety of places – such as your web server, the plugins or theme you have installed, the WordPress core, and sometimes even from you.
Even if your website doesn’t go offline, error messages, blank screens, and missing content can affect your site’s bounce rate. Therefore, make sure you know how to troubleshoot these WordPress issues the second they’re detected.
Moreover, don’t forget to have an automated system of backups running in the background. On the off chance that one of these errors can’t be resolved (like in the case of a security breach), regular backups can save your website.

0 comments